
Overview
As a COI administrator, system administrator, implementation project team member, or business analyst you can configure the COI system so that it supports the business practices/policies and organizational needs of your institution. The Forms Designer functionality in Templates allows an Institution to customize how the COI module will work and what information is gathered for each type of disclosure in conjunction with the other Configuration options in COI. Kuali provides basic templates that can be modified for your Institutional needs, below is an overview of how to create and maintain templates in Kuali Research COI.
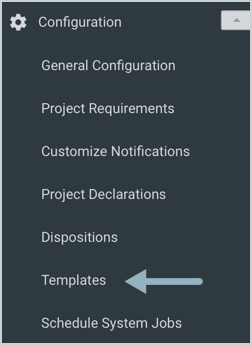
Accessing COI Templates
Users assigned to Administrator role(s) have access to Templates on the COI menu bar.
In the Templates menu all Active, Pending, and Archived COI templates are displayed. This menu also displays the template Version number, Created date, Created By, Published date, Published By, Status, and # IN USE columns (number of disclosures using this template).
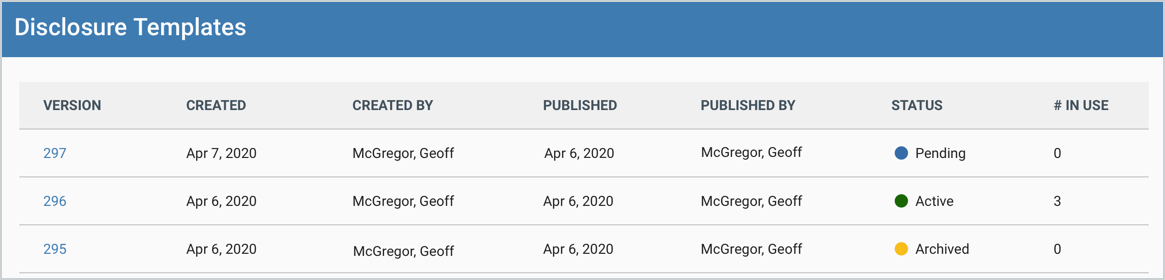
There is only one Active template and you can edit the template at any time. Once a template is edited and saved a Pending version is created until it's published when it becomes Active. Prior version(s) go to Archived status and any disclosures associated with that template will be maintained under that older version until the next edit when the current Active template is then applied.
Editing a Template
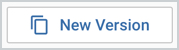
When you want to edit any of the templates simply click on the current Active template which will show you the details of the template. To proceed with a version edit click the New Version button in the top right-hand corner:
Be aware that any edit to a template should be thoroughly tested in a test environment prior to applying to your live PRD environment since templates will affect functionality.
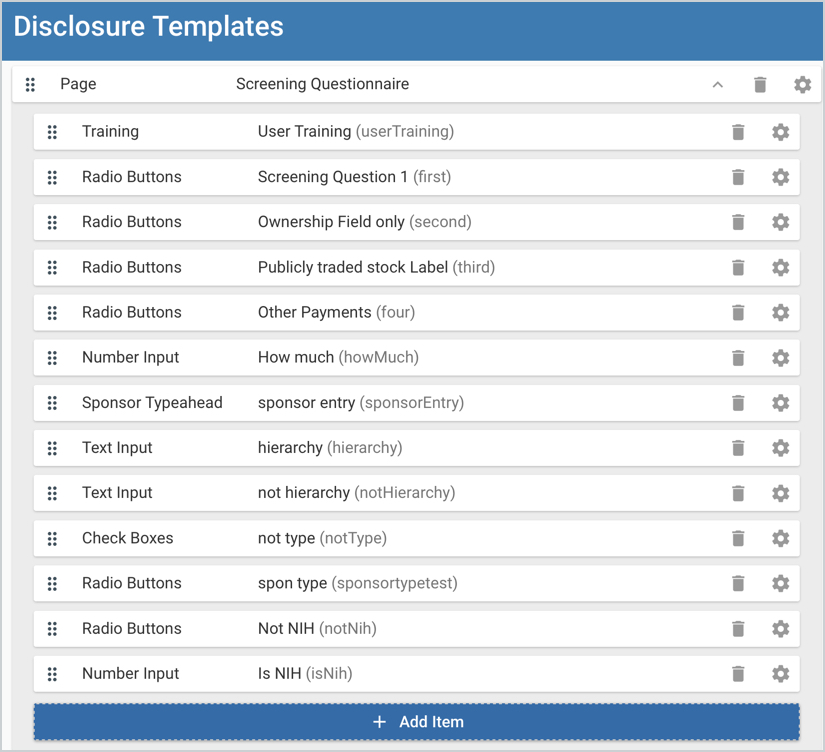
This will open a pending template in edit mode and give you the Form Designer options. You can add different forms sections within the template, additional elements within the forms, edit existing sections/elements, reorder sections/elements, or remove elements entirely. You can use the 'Add Item' to add an element, the trash icon to remove, or the gear icon to make edits to the field gadget.
On the righthand side you also have the Actions menu to select other options.
In the Actions menu, you can choose between Edit or View Modes. This allows you to have edit access to the template or preview how the template will look to an end user.
By default, View Mode will preview how the template will look to you as the end user. If you want to test various project scenarios you can search for a user in the system. The Template Preview will then populate according to the progressive display rules in the project gadgets with all of their currently active projects, as defined in the Project configuration. You can also complete any editable fields in the user's projects.
Be aware that you cannot dynamically change between users in View Mode. Once you preview the template as another user, you will need to refresh the page before searching for a different user in the system.
In the template you have the Publish button in the Actions menu. Any edits/updates you make to the template will save automatically but only until you click the 'Publish' button will the template become the Active current Template for disclosures. Make sure you have tested changes thoroughly before doing the publish action; especially in your live PRD environment.
Also available in the Actions menu are the Export Template and Import Template options.
These options allow you to export a file in json format so you can apply to environments with the import feature. The exported json can also allow direct edits by those with enough functional knowledge to make those changes. The export/import option is a good way to thoroughly test template changes in a lower test environment, export, and then import in your live PRD environment. Be aware, the Export Template and Import Template is a powerful tool that should be used carefully since template changes affect how the system functions and always requires testing; especially after the import action please confirm all looks and behaves as expected.
Using Form Designer
Once a new COI template version is initiated the Form Designer become available and gives you the option to design the overall layout of your protocol form and what elements/fields are within the sections. For example, within your COI template you may want to have a disclosure form to gather general information, questionnaire, financial entities, etc.
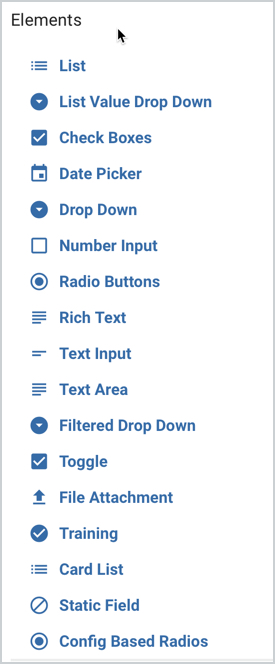
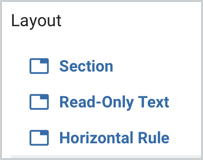
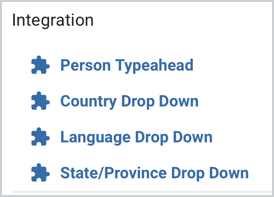
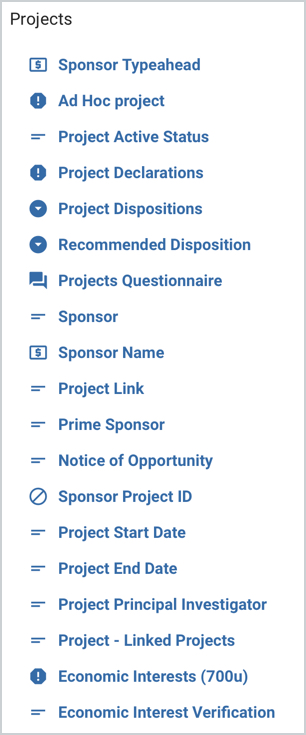
The +Add Item button within the form will open a side panel giving you options of gadgets within Elements, Layout, Integration, and Projects that can be added to the given form.
Element - Customize specific parts of your protocol form with a variety of options like adding a text field, radial button, lookup, date selector, etc. to the specific section of the template. Certain elements may be pre-loaded with selections, such as the country drop down list, and others are configurable so you can customize the options available.
Layout - Allows you to configure major parts or sections of your form. This gives your COI template its general structure and design. These added sections can then be further customized with specific attributes or options via the Elements options. For example, adding a general Section with a field text entry or adding a Questionnaire Section to gather information via questionnaire functionality.
Integration - Gives options to select data from other sources.
Projects - Gives the options to integrate your disclosure with project information from the Sponsored Projects module of Kuali Research so you can automatically push to require disclosure on projects (Proposals, Institutional Proposals, and/or Awards). You can also add questionnaires for projects to gather additional information as desired. More detailed information on these gadgets and other configuration required can be found in the COI - Template - Project Gadgets article.
More detail on each specific gadget can be found in the Form Gadgets article.
Once you select the desired Layout, Element, Integration, or Projects option it will open another window where you can specify more detail and settings for the given selection.
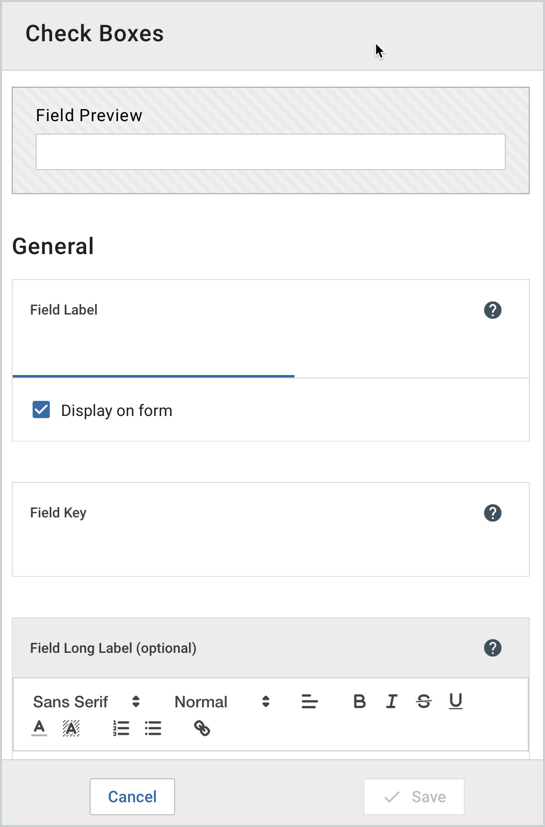
Once you click Save it will be added to the protocol template where it can be moved to the desired order via the three hash mark icon on the lefthand side. You can also delete it or edit it further via the trash and gear icons on the righthand side of the section/element.
Comments
0 comments
Article is closed for comments.